Signing in and Syncing Browser Bookmarks
Chrome
Chrome's Official Instructions that include Android and iOS:
Chrome Browser
In order to turn on sync, you must have a Google Account. Your @umd.edu and @terpmail.umd.edu are Google Accounts.
- On your computer, open Chrome.
- At the top right, click Profile
.
-
Click Turn on sync....
-
If you're not signed into your Google Account, you'll be prompted to sign in.
-
-
Click Yes, I'm in.
Firefox
Firefox's Official Instructions on Creating an Account and Enabling Sync:
Create a Firefox Account & Sync
Firefox Browser
If you're already signed in (see How do I know the status of my sync?) click Sync Now to start syncing immediately.
You will need a Firefox account to enable sync. To create an account:
- Click the menu button
 to open the menu panel.
 - Click the Sign In button next to Sync and save data.
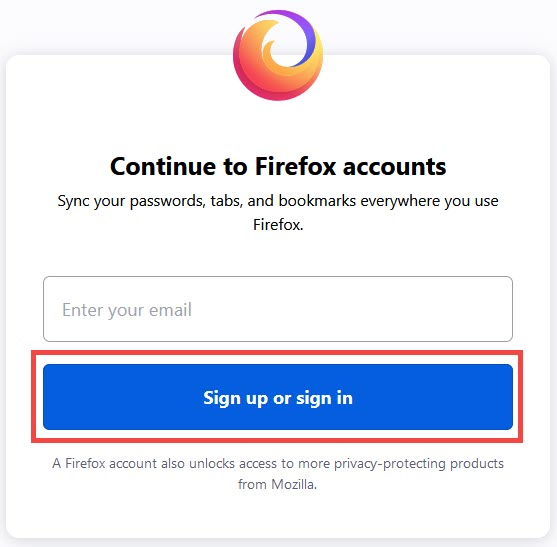
- The Firefox accounts sign-in page will open in a new tab.
- Enter your email and click Sign up or sign in.
- Create a password and enter your age (Why do we ask?) and click on Create account
- Take note of the email address and password you used: You'll need them to sign in.
- Choose what information to sync. (See How do I choose what information to sync on Firefox?)
- You will receive a confirmation email from Firefox with a 6-digit confirmation code. Use it to confirm your account.
- Once your account is confirmed, sync is enabled automatically.
Safari
Create Apple ID
Mac OS
For troubleshooting and enabling bookmark sync, here is Apple's official support article:
If your iCloud or Safari bookmarks aren't syncing
First, make sure you are Signed into iCloud: (If you are already signed in, skip to step 2)
-
On your Mac, do one of the following:
-
macOS 13 or later: Choose Apple menu
 > System Settings, click [your name] at the top of the sidebar, then click iCloud on the right.
If you do not see your name, click 'Sign in with your Apple ID', enter your Apple ID (or a Reachable At email address or phone number that you added in Apple ID settings), enter your password, then click iCloud.

-
macOS 12 or earlier: Choose Apple menu
 > System Preferences, click Apple ID, then click iCloud.
If you do not see Apple ID, click Sign In, enter your Apple ID and password, then click iCloud
-
- Then make sure Safari is checked in your iCloud settings.


- Safari will try to sync either when you turn on Safari in the iCloud settings or when you try to go to any webpage in Safari.
Windows
Safari is no longer supported on Windows by Apple and should not be used.
Opera
Opera's Official Instructions on Creating an Account and Syncing:
Opera Browser

Use the Opera account button located to the right of the combined search and address bar to sign in to your Opera account. You can also find this in Settings (Preferences on Mac) > Browser > Synchronization.
When you’re signed in successfully, the button will display a green check mark. This check mark indicates that Opera is syncing your browsing data to your account.
If you don’t have an Opera account, click the Create my Account! button to register for one.
To select what kinds of browsing data Opera syncs between devices:
- Go to Settings (Preferences on Mac).
- Click Browser in the sidebar.
- Under Synchronization, click the Advanced Configuration button.
- Tick or untick the checkboxes next to the data types you wish to sync.
Edge
Microsoft's Official Instructions on Signing into an Account and Syncing:
Sign in to sync Microsoft Edge across devices
Edge Browser
If your device is University owned and you are logged in with your Directory ID, your Edge may already be signed into your UMD Microsoft account and syncing.
-
- Confirm your Microsoft edge is logged into the Microsoft account with the Bookmarks/Favorites you want synced by clicking the
 profile icon at the top of the browser.
- If there is no account signed in, sign in using the account you have bookmarks on. (Most likely your @umd.edu account)
- If you are signed in, you will see "Sync is on" under your account, when you click on the
 profile icon.
- Confirm your Microsoft edge is logged into the Microsoft account with the Bookmarks/Favorites you want synced by clicking the
If you are signed into the account with the bookmarks you want, but they haven't synced:
- Go to edge://settings/profiles, and click "Sync" under the account you want synced.
- Make sure the "Favorites" toggle is switched on.
- Close and re-open Edge.
- Click the
 profile icon, and confirm it says "Sync is on".
 - Your bookmarks should have synced.
Exporting and Importing Bookmarks/Favorites
If syncing didn't work, you can try exporting your bookmarks from one machine and importing them to the other machine.
- On the machine with the bookmarks you want, open your "Favorites" button, and click on the "..." inside that window, and "Export favorites".

- Copy that file to the other machine. (Through emailing yourself or transferring on a USB stick)
- On the machine without your bookmarks, open your "Favorites" button, and click on the "..." inside that window, and "Import favorites", selecting the file you brought over.


