Citrix Virtual Computer Lab (VCL)
Note: The VPN is required to access the VCL from Off Campus
For more information, please visit this ask article.
The maintenance window for the VCL is Tuesday mornings from 5-7 am. Expect disruptions and outages during this time frame as we do our best to keep our technology up to date.
The VCL leverages software provided by Citrix to perform its tasks, so that the required resources are handled by our servers and not your computer. This allows more widespread access to resource-intensive programs on a wider variety of computer hardware than would otherwise be possible.
Getting Started
We recommend updating your installation of the Citrix Workspace App before every semester for the latest performance enhancements, security updates and bug fixes. If you are still running Citrix Receiver (replaced by Workspace App), please upgrade now!
Download and install the Citrix Workspace client for your platform:
- Windows - Choose the Download button for "Citrix Workspace App".
Recent versions of Citrix Workspace for Windows match display resolution and DPI scale settings of the local Windows client to the Citrix session. To make text larger, we suggest setting “Scale and layout” to 100% in the Settings on your Windows computer. - Mac
-
Linux
- Download the Citrix Package from this URL: https://www.citrix.com/downloads/workspace-app/linux/workspace-app-for-linux-latest.html
-
Ubuntu 22
In the terminal, enter the following command to install the Citrix Workspace App:
sudo apt install -f ./icaclient_<version>._amd64.deb -
Ubuntu 24
In the terminal, enter the following commands to install mandatory packages and libraries before installing the Citrix Workspace App:
Add packages:
sudo apt-add-repository deb http://us.archive.ubuntu.com/ubuntu jammy mainsudo apt-add-repository deb http://us.archive.ubuntu.com/ubuntu jammy-updates mainsudo apt-add-repository deb http://us.archive.ubuntu.com/ubuntu jammy-security mainInstall the library:
sudo apt install libwebkit2gtk-4.0-devPost successful installation of the library libwebkit2gtk-4.0-dev, remove the the repositories:
sudo apt-add-repository -r deb http://us.archive.ubuntu.com/ubuntu jammy mainInstall the Citrix .deb package:
sudo apt install -f ./icaclient_<version>._amd64.deb - Note: Linux installation requires an extra step to set up the drives. See Mapping Client Drives also can use Preferences or Accessing your PC Drive and Local Printer from the Citrix Session" about 3/4 down on the Citrix ICA Client How To page.
- For additional info visit:
- Mobile- The server is https://virtlab.eng.umd.edu, and when logging in, the domain is AD.UMD.EDU.


When prompted, enter https://virtlab.eng.umd.edu as the web server and at the login dialog enter your UMD directory ID username and UMD directory password.
Once you set up Workspace App, you can access VCL applications from the Workspace App, or directly from the website, https://virtlab.eng.umd.edu
We have made some desktops available for remote connection, you may access them here You still need to have the Citrix Workspace App installed and configured. When finished, please click the Ctrl+Alt+Del button at the top and sign out.
Login
After installing the client, you can launch applications from the Login page by entering your Directory ID username (NOT your UID number) and your directory password, or you can launch them from the Citrix Workspace application on your computer.
Run Application
After logging in, click on an application to run the program. When prompted, choose "Permit all access" to allow the VCL to access your machine for opening and saving files. Check the "Do not ask me again for this site" box to not be asked every time you use the VCL from your computer.

VCL Software List
Saving Files to Your Personal Computer
- Save in \\\\Client\\C$(location will vary depending on the application you’re using). You cannot save to the C: drive on the VCL application host servers. On Windows, \\\\Client\\C$ is the root directory of your client computer. On a Mac, \\\\Client\\C$ is your Mac Home folder. In some applications, we map a V: to \\\\Client\\C$ since they do not handle the UNC mapping well. You may also be able to save to a USB, if your USB is the E: drive, then \\\\Client\\E$

- The Documents folder on the VCL is redirected to your personal space on our files server, the U drive
Saving Files to VCL Server User Folder (U)
An option to save to a user folder on a VCL server share. Your folder will be mapped as the (U:) drive.
- 2 GB storage per user, saved files available to you in future sessions (automatic increases up to 10GB in 2 GB increments, updated daily based on usage)
- Available via Secure FTP, such as WinSCP on Windows or Cyberduck on a Mac (click the link under "Download" for the free version of Cyberduck), hostname: vclfs.eng.umd.edu Use SFTP setting or specify port 22
- Significantly better performance with applications that use a lot of disk I/O
- Alternative if you are having an issue saving locally, or some applications which have issues saving locally such as Cadence


Saving Files to TERPDrives/Kumo Cloud Storage
This service will map a Windows drive in your VCL or computer lab session to any cloud storage spaces you authorize (Box, Google Drive, DropBox, OneDrive). You control what cloud storage services to connect to, if any. To do so, go to kumo.umd.edu and authorize which cloud services you would like to use when using the VCL and computer labs. Then, when launching applications in the VCL, those drives will be mapped as in the image below.

Thanks to DivIT for offering this service.
Saving File to USB, External Hard Drives, and Your iPad
On many applications, you will be able to save to other drives on your client machine, such as a USB device or additional hard drive.
Saving locally to your iPad from the Citrix Workspace for iPad app
- Save locally just as you would do from a typical VCL session from a PC or Mac. The local iPad storage may show up as \\\\Client\\C$(V:) or Local Disk (C: on <iPad name>), depending on the app.
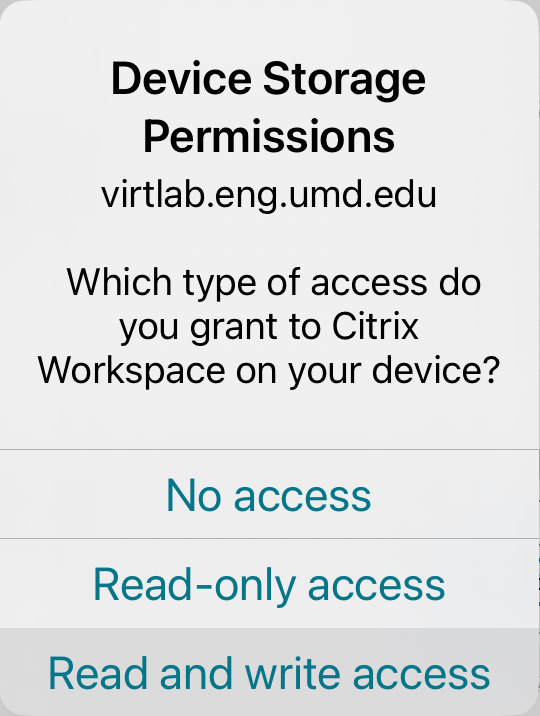
- When you first attempt to access this location, you will be prompted to grant access to Citrix Workspace. Select "Read and write access".
Logging Out
Windows
In most cases, exiting an application will close your session; however, closing some applications (such as Creo Parametric and Cadence) doesn’t always fully end your session properly. If you are having trouble running an application you recently closed, your session may not have fully terminated.
To fully end your session:
- Right-click on the Citrix icon in the icon tray (^ Up arrow) in lower right-hand corner of the screen.
- Choose Connection Center.

- Highlight the server, then choose Log Off.

Mac
- Right click on the Citrix Viewer icon in the Dock and choose Quit.

- Choose Log Off.

Troubleshooting Citrix Workspace
If Citrix Workspace fails to launch applications properly, try the following troubleshooting steps:
- The simplest troubleshooting step is to reboot your computer.
- If that doesn't work, try uninstalling Citrix Workspace and reinstalling the latest version, using the corresponding link from the "Getting Started" section at the top of this article.
Further Windows-specific steps
- If reinstalling the latest version of Citrix Workspace doesn't resolve the issue, try the following steps, in order:
- Uninstall Citrix Workspace
- Install the latest x64 version of vc_redist.x64.exe from https://learn.microsoft.com/en-us/cpp/windows/latest-supported-vc-redist?view=msvc-170
- Reboot your computer
- Open an elevated command prompt and reinstall Citrix Workspace from the Command Prompt using the /CleanInstall flag:
- Search for "Command Prompt" in the Windows Search Bar, then click the "Run as Administrator" on the right side of the screen
- In File Explorer, navigate to your downloads folder, Right-click on the downloaded Citrix Workspace installer and click "Copy as path".
- In the Command Prompt:
- Paste the copied path by right-clicking in the Command Prompt
- then add a space, then type:
- /CleanInstall
- then press Enter
- For example:
C:\\Users\\[username]\\Downloads\\CitrixWorkspaceApp.exe /CleanInstall
- If that doesn't work, try downloading an earlier version of Citrix Workspace, then clean install using the instructions from Step 4 above.
- For particularly difficult cases, installing Citrix Workspace version 2203.1 LTSR CU6 has been successful